• 🏆 Texturing Contest #33 is OPEN! Contestants must re-texture a SD unit model found in-game (Warcraft 3 Classic), recreating the unit into a peaceful NPC version. 🔗Click here to enter!
  • It's time for the first HD Modeling Contest of 2024. Join the theme discussion for Hive's HD Modeling Contest #6! Click here to post your idea!

Geoset Importing and Exporting Guide

Level 22
Joined
Jun 28, 2010
Messages
3,336
Geoset Importing and Exporting Guide
By -Peper-
Requirements:

Vertex Modifier (Optional)
War3 Model Editor

Introduction:

What will we do in this tutorial?
We will learn the basics of geoset exporting and importing using Magos' Model Editor.​
Do we need the vertex modifier tool?
Nah, it's optional. It helps keep the polies low.​

Note:
You should have at least an average knowledge of Magos' Model Editor.

In this tutorial, we will learn the basics of geoset exporting and importing. We will be making a Rifleman with a Footman's head.

Part 1: Exporting
  • First, open the Footman's model using the MPQ Browser.
    Tutorial1.JPG
  • Second, rip off his body. This can be simply done by scaling the body part to 0. (NOTE: If you have experience with the Vertex Modifier, use that tool for this part instead.)
    Tutorial2.JPG
  • See? Now he is decapitated.
  • Next, find the appropriate geoset that contains the head.
    To do this easily:
    Tutorial3.JPG
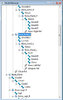
    1. Open the Geoset Manager.
    2. Randomly select one Geoset and set the Material ID to [none].
    3. See if the head disappears, and if it does, then export that geoset. If not, then try another geoset until you find the right one.

Part 2: Importing
  • Open the Rifleman model using the MPQ browser.
    Tutorial4.JPG
  • Next, scale his head to 0.
  • From your MPQ browser, search for Textures/Footman.blp. Right-click it and select "Use As Texture".
  • Open the material manager, right-click anywhere and select "Create New".
    Tutorial5.JPG
  • A new window will open, and right click inside it again. Select Create new.
  • Another window will open again, and set the Texture ID to Textures/Footman.blp. Click OK on everything. Make sure you remember what the name of the newly created material is.
  • This is the IMPORTANT PART, bone attaching! Why?! Because if you don't attach it to a bone, it will be invisible in-game.
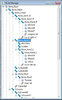
  • Go to the node manager, and search Head-Ref.
  • You will see a bone-logo thing (must be a bone), and beside it is CYLINDER03, CYLINDER04, and Object4.
  • Remember the most suitable, Object4.
  • Go back to the geoset manager, right-click, and select Import.
  • Import the Footman head, and when prompted to, select Object4.
  • A new geoset has now been created, so double-click it and set the Material ID to that of your created material.
    Tutorial6.JPG
  • The Footman's head has now appeared! Move it around to connect it to the body.
    Tutorial7.JPG
  • And FINISH! You made yourself a new unit, and now save it!

Important Note:
The Decay Bone animation doesn't display his head, so please view the following tutorial for the solution:
http://www.hiveworkshop.com/forums/...2/fixing-faulty-death-decay-animations-40794/
 
Last edited by a moderator:
When the head's scale is reduced to 0, are the vertices removed or still there? If they are still there, then that might not be the best idea as that will result in unnecessary polygons in the model. So, is there any other way to do it in Magos?

If there is no other way, then that method should be fine. =)
 
Level 20
Joined
Nov 20, 2005
Messages
1,178
Well, let's just say this model is a ghoul modified and it had his "wood on shoulder" deleted to delete his worker task(animations are deleted but i fixed that).
Now, i checked the ghoul's bone where supposely the wood was on to and i found on node manager the text "lumber" next to a blue bone icon, right under another blue bone icon named "shoulder2" which was under a helper called "Bone_Arm1_L".
What i did so far:
I created new bones exactly like these ones i just told but.....heck, i'm seeing unequal things now here. :/ see attached images.
I surely thought wrong when i saw both "Bone_Arm1_L". The first is a helper(the original ghoul's) but the other is a bone itself. I feel a bit stuck now.

EDIT: Ok i managed to make it show up but i still can't put it on the shoulder, it only goes in the same space of the left arm. It was invisible because the material ID was missing so i temporarly set it to one of the model ones to see where it is. I guess i have to import peasant.blp to gain a common lumber look, but how? I tried to import peasant.blp in texture manager but there's not a new voice in material ID.
 

Attachments

  • modeleditorghoulnodes.jpg
    modeleditorghoulnodes.jpg
    52.7 KB · Views: 7,430
  • modeleditoraliennodes.jpg
    modeleditoraliennodes.jpg
    58.1 KB · Views: 7,422
Last edited:
Level 20
Joined
Nov 20, 2005
Messages
1,178
When you import peasant.blp, make a new material and select the peasant.blp. And reference the geoset to the new material.

Hahhhhh!! It works!!!!! ^^ +rep! Now the next and last thing. How do i change a model(for expample a spider egg) turning it to a geoset and repeat the same process?

EDIT: i did it, imported geoset, placed material id etc. etc. but the egg bends toward a different point when i play its animation instead of how i place it in the model editor.

EDIT 2: i managed to make it appear properly. Now i only have to see if it shows in game.
 
Last edited:
Level 2
Joined
Jan 16, 2011
Messages
11
hello, i tried this with weapon but the weapon's skin/texture is different. i did the mpq browser to "used as texture"
it is okay if i use other unit model? (not from war3mpq)
or i should use war3mpq unit so the weapon's skin will appear correctly?
 
Level 2
Joined
Jan 16, 2011
Messages
11
You can use other skins and models (like gun skin if you want to attach one) but you must import the skin too if you will import the model with custom texture.

when im changing texture the edited model , my portrait can't display or bugged
:goblin_boom: but imported with the portrait model. sry for bothering again :vw_sad:
 
Top